Showing posts with label Butterfly Theme. Show all posts

Butterfly B's & 123's

Wow, I had a bunch of stuff that I did not post yet! I am trying to get it all in so I can share the rest of my Insect Themed Activties w/you! We have been up to some fun stuff around here!

Butterfly B Craft

B is a review letter for us (we did B is for Bear) but I am going over the letters for each insect as we talk about them during our Insect theme. The Lil Divas know how to write the ltter but I thought it would be fun to make a Butterfly B. So I drew and cut out a large B and then I traced it onto white paper to form butterfly wings. I added a body in the middle and the LIl Divas had a cute Letter B Butterfly sheet to design/color.


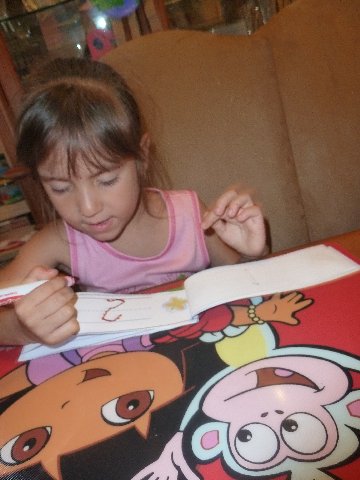
Butterfly Number Writing Review from Confessions of a Homeschooler


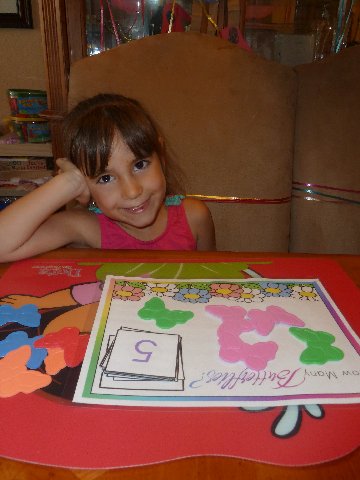
Butterfly Counting Mat (The Littlest Diva) from Confessions of a Homeschooler


Counting mats are too easy for my Oldest Diva at this point so I wanted to do some simple addition with her. She used little butterfly erasers I had found a while back at Target $1 Spot - I love those bins! We worked on simple addition problems but I did not get pictures this time because I was too busy working with her. 

I had her work on a white board and  we wrote out the problems together. I wrote __ +__ = for her and she would fill in the numbers based on cards she would flip over from her pile (I only had her use numbers 0-5 this time) and then she would count the butterfly to add them up and write the answer.

She liked this activity and caught on quickly so we will be doing it again and adding in larger numbers as we move along. I will also begin doing basic subtraction with her.

Butterfly Counting Books - The Oldest Diva is still hvaing trouble identifying numbers 12, 13, and 15 so I sneak in review how I can without boring her with easy counting. She can count them & knows the order - but she has trouble identifying the written numbers since those do not sound like what they are - like fourteen, sixteen, etc....

We worked on these butterlfy couting books where I had written the numbers and number words and the Lil Divas had to count the correct number of butterfly stickers and add them to the page. Since it used stickers - she was all for doing it!

I cut out butterfly shapes from foam and paper, hole punched them and used a pipe cleaner to make a ring (I did not have binder rings).

We think Ttey came out cute! :)


Next we will share our Bee activities with you! Insects are all the rage around here right now!

Bern

Sight Word Fun & Learning to Read Week #2 - Butterfly Theme

Last week we focused on: sight words: it, me, can, you, like and the -ut word family (for butterfly)

Sight Word Activities:

Game: Slap it!

How To Play: I wrote out the week's sight word on butterfly cards and placed them on the table along with last weeks target sight words. I would call out a word and the Lil Divas had to slap their caterpillar down on the correct word! :) This game always produces lots of laughs and they beg me to play it throughout the week! I included last week's words (written on caterpillar cards) along with this week's words for some review as well.


Forming Sight Words w/Letter Tiles - I wrote the weeks words on large butterfly cutout and provided the Lil Divas with letter tiles. They got busy reading the words and then using the tiles to write the words.


Sight Words Song - while working with the letter tiles we sang a simple sight word song for each word to help the lil Divas with the spelling/recognition of each word. The Oldest Diva really liked this & was singing the song with different sight words all week on her own! I love when an idea just takes off! :)

What We Sang: The Sight Word Song (sung to to the tune of B-I-N-G-O)

There was a sight word I wanted to spell and CAN was my sight word.
C-A-N (clap with each letter) spells can,
C-A-N (clap with each letter) spells can
and can was my sight word!

We followed the above tune/format for each of our sight words!

We continue to use Sight Word Printables from MissChapple.com. They include writing the word, recognizing and finidng the words in a chart/table as well as within sentences. The girls have really gotten the hang of these - even the Littlest Diva.


Sight Word Puzzles from 1+1+1=1 - both the Lil Divas enjoy these. We also reviewed last week's words again.

Play Dough Sight Word Cards (also from 1+1+1=1) Last week we used our Wikki Stix but this week we used play-doh. It was a bit more challenging - to work the dough into the right thickness, etc.  This was great fine motor practice for the Lil Divas & they had fun making the words this way.


I also made a mini sight word book for each of the Lil Divas. It is basically an index card spiral notebook in assorted colors. I wrote each of their sight words in the book and they flip through the book and read the words. I leave this within easy reach so they can do it whenever they like. The Oldest Diva likes to read them on her own. The Littlest Diva isn't as interested and I don't push it but it's there for her too.

-ut Word Family Activties:

We used a fun Word Slide to review and sound out different -ut words like but, hut, cut & nut. I laminated and cut it out (it is really easy to make and use). The Lil Divas enjoy using it and reading all the words independently.


We are currently reading Bob Books (Set 1) - Beginning ReadersScholastic Sight Word Readers, and Starfall Books as well as Starfall.com.

Plus, I use mini-readers that fit into our word family focus when I find some on the internet that are appropriate.

Do you have any fun ways to review sight words? I'd love for you to share your ideas with me!

Bern
Linking to  Read, Explore, Learn , For the Kids Friday,  Preschool CornerFeed Me Books Friday  , Fun for Kids Friday , and Creative Juice Thursday

Fancy Girls and Posh Jeweled Butterflies

The Lil Divas really enjoyed our Caterpillar/Butterfly Theme. It was definitely one of their favorites to date. Honestly, what is there not to love about butterflies - especially when you get to witness the magic first-hand like we did!

We read many wonderful butterly books which I shared with you in various posts. We learned lots of wonderful information this way but one book we read simply for fun because we LOVE the series - Fancy Nancy: Bonjour, Butterfly.

We adore Fancy Nancy and we hadn't read this particular book in awhile so on the final day of our butterfly theme - I pulled it out and we oohed & ahhed over the glittery cover and got to reading!

The Lil Divas never tire of the wonderful illustrations or the big, fancy words in these books! They are perfect for Posh Lil Divas like mine & this one does not disappoint.

Craft: What else can you do after reading a posh book except make a Posh Jeweled Butterfly! (I must admit this craft was inspired by another blogger's craft. Unfortunately, I do not have the link! So sorry!)


What You Need:
3 Pipe Cleaners - 1 for body & 2 for wings
beads

What To Do:
1. Take the pipe cleaner you will use for the body and fold in half. Twist it around leaving some of the ends free to form antenna


2. Attach the other 2 pipe cleaners to the bottom of the body so that you have one on each side of the body.

3. Let your child add beads as desired but leave room to manipulate the pipe cleaner.

The youngest Diva just added whatever beads she wanted


The Oldest Diva decided to make a symmetrical pattern - she learned well!


 Here is her finished pattern:


4. I then made a wing shape and twisted the ends around the top to close the wing shapes and tada - you have a gorgeous jeweled butterfly even Fancy Nancy would approve of!


These butterflies were so easy to make, required only a few materials, and they turned out Oh, so posh &  unbelieveably cute! :)


Do your kids have a favorite book series that they never get tired of reading? I'd love to know about it!

From Caterpillar to Butterfly

I am so excited to share our Caterpillar to Butterfly experience with you!

We spent the last 2 weeks observing our Painted Ladies change from Caterpillars to Butterflies!

The Lil Divas really enjoyed watching the life cycle changes before their very own eyes - In my opinion, nothing beats seeing this up close & personal.

The Lil Divas learned so much from observing the metamorphosis first hand & no matter how many times I have watched this - it never ceases to amaze me!

So here's is our picture journey:

Our caterpillars on the very first day they arrived:


They grew quickly & within 2-3 days we could see their skin had split and they were noticably longer and fatter


Within 5 days the first of the caterpillars was getting ready to begin his changes - see it form the "J" shape below (the girls found this so cool!)


Our first chrysalis & others beginning their change


All 5 chrysalises were soon ready


We took them out of the container and put them into the butterfly (net) pavilion


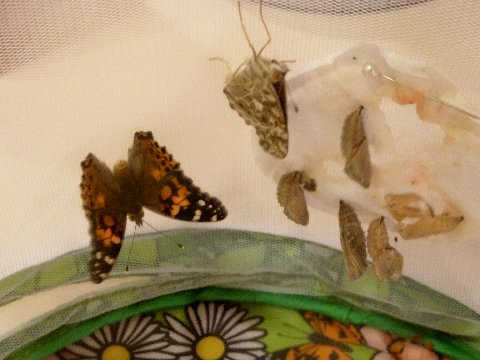
Within a week we had our first butterfly - I don't know if it was due to the heat here in FL but the process was really quick for us. We had our caterpillars turn into butterflies in less than 2 weeks (for the whole process)


The next day we had our 2nd butterfly, on the 3rd day we got 2 more and the final one came a day later


Here the Painted Lady is drinking some sugar water


Here's what our Painted Ladies looked like


Release Day


Wasn't that AWESOME! :)

I ahve to say, the Lil Divas were a bit sad to see the butterflies go but they know they are meant to fly free so they can lay their eggs - giving us more beautiful butterflies!

Plus, I think it helped them to know we have ladybugs on the way to observe next as part of our Insect Theme ;)

Be sure to check out all my Caterpillar & Butterfly Themed Posts - lots of info & ideas!

You can view our  Butterfly Life Cycle Craft Here - includes lots of great preschool books on the topic as well!

Some more Caterpillar/Butterfly Themed Crafts & Activities Here

Have you raised caterpillars to butterflies?

Bern

Life Cycle of a Butterfly - Learning w/Pasta & more

After a week devoted to caterpillar fun we naturally progressed into our butterfly theme this week.
I started the week discussing the Butterfly Life Cycle (which we also touched on last week). There is just no better way to teach this than by observing it first hand.

We have had such a wonderful time watching our caterpillars grow, shed, prepare and form their chrysalis and emerge as butterflies right before our eyes! Our fifth and final butterfly emerged from it's chrysalis today - the Lil Divas were beyond excited!

Look for our butterfly post soon - we release them tomorrow & then we will share our entire experience with you! :)
Great books we read this week on the Butterfly Life Cycle:

Butterfly House


From Caterpillar to Butterfly


Caterpillar to Butterfly


Born to be a Butterfly


Becoming Butterflies


Magnificent Monarchs


Where Butterflies Grow


Waiting for Wings


Are You a Butterfly?


Butterfly Life Cycle Review - Playing w/Sequence Cards

I found some butterfly life cycle sequence cards from Preschool Post that we used. The Lil Divas had to sequence the life cycle (they did great by the way - they told me it was easy, lol!) and then I had them match up the words to the pictures as well (that was trickier).

Butterfly Life Cycle Pasta Craft:


I had an entirely different craft in mind for our study of the Butterfly Life Cycle but my girls were restless, my allergies were raging and Mama was just plain tired to undertake the big craft I had planned on that particular day.

Then, I remembered the quick & easy pasta life cycle craft I did with my 2nd graders (I had a class of 30 so quick and easy was essential!). They had enjoyed it and it really helped them recall the different stages.

I looked in our cabinets and found that I could make it work! Yay! So, I whipped out the food coloring to make it a bit more festive for the Lil Divas and we set to work coloring some of our pasta in preparation.

What You Need:
Construction paper - blue & green
tacky glue
pipe cleaner (we just used 1)
rice (uncooked) - just a few grains - these will be the eggs
shell pasta - 1 - this will be the pupa/chrysalis
wheel pasta (3 or 4) - to make the caterpillar
bow tie pasta - butterfly - use as many as you would like

Prep - use the green construction paper to make 2 leaves. We cut a little hole in 1 to make it look like the caterpillar took a bite out of it.

What To Do:

1. Fold paper into half & then half again to make 4 equal squares (1 for each stage of the life cycle)

2. Discuss how a caterpillar begins it's life - as an egg. Then in box # 1 add a leaf then glue a few grains of rice (eggs) to it. Add the word egg to label.


3. Discuss what hatches from the egg - a caterpillar & talk about what it does - eats lots of leaves to grow & prepare to become a butterfly. In box #2 add the other leaf (w/cut out) and glue on your wheel pasta to form a caterpillar. Add the word caterpillar to label.


4. Discuss what happens to a caterpillar after it has eaten & grown - it becomes a pupa/chrysalis. In box # 3 add the pipe cleaner (branch) and glue your shell pasta. This is the pupa or chrysalis - label.


5. Discuss what emerges from the chrysalis - a butterfly. In box #4 add your shell pasta and label with the word - butterfly.


Now that you have completed your life cycle let your child use it to explain the life cycle of a butterfly to you!


Tis the saeson for life cycle explorations! What life cycle crafts/lessons have you explored with your children?

Bern
Linking to STart, Childhood 101 - We Play!Sharing Time,  Get Crafty,  Read, Explore, Learn , For the Kids Friday,  Preschool CornerFeed Me Books Friday  , Fun for Kids Friday , It's Playtime , and Creative Juice Thursday