Showing posts with label Zoo Theme. Show all posts

Animal Cracker Math, Handprint Zoo Animal Art & Counting Books, Oh My!

Our Zoo Theme was full of hands-on learning fun.

There are so many things I wanted to share with you.
Unfortunately, I did not capture all of our fun on film :(

Today, I will share a few fun activities that I managed to capture!

 Handprint Zoo Animal Fun:
I just can't resist a cute handprint craft opportunity!

What You Need:
yellow, brown, black & white paint
thin paint brushes
construction paper
permanent markers
What We Did:

To Make a Handprint Giraffe:


1. Paint entire hand with yellow paint & press firmly to paper


2. Using pinky dipped in brown paint add spots & hooves


3. Add tail, hair & face (we used permanent marker for face)


The Lil Divas Handprint Giraffes:

5 yr. old                           4 yr. old


To Make a Handprint Zebra:

1. paint hand white


2. press firmly onto paper


3. using pinky draw tail & add dot of block (hair)


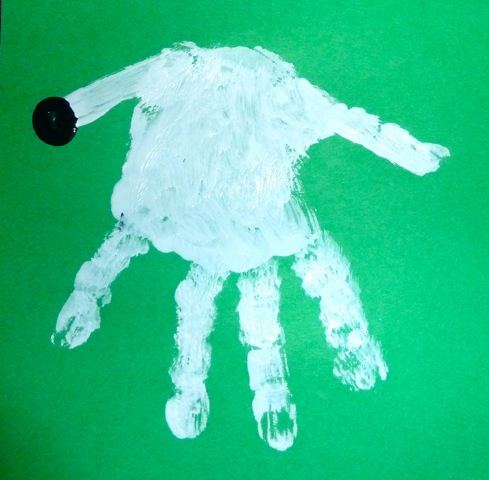
4. using thin paintbrush use black paint to add stripes as desired


4. add some hair and facial features (we used black permanent marker for face)
& behold your adorable handprint zebra!


The Lil Divas Handprint Zebras
5 yr. old                               4 yr. old

A fun activity, cute craft & fabulous keepsake!

At the Zoo - An Easy Reader Conuting Book:
This was a homemade easy reader activity for my soon to be Kindergartener.
The Littlest Diva did it too & she did really well.


I kept it simple going from #1-5 and used a repetitive phrase with sight words and words that she should know. It was fun for her to make her own book and then read it to all of us!

What You Need:
3 sheets of white paper
zoo animal stickers
pencil


What We Did:

I typed out a general template for the book with a title page and then a page for 1-5 zoo animals that said "I can see (fill in number) (fill in animal) at the zoo. I had the numbers pre-done. The Lil Divas choose 5 animals to use in their book and put on the correct number of stickers for each page. I then helped them spell the animal word and they added it to each page accordingly.


Once we were all done with our books -
the Oldest Diva got to read hers to us!

The Littlest Diva needed help but she read quite a bit of it on her own too!

I am so proud of their developing reading!


Here is a full peek at what our books look like:


 Simple, straight forward and a wonderful math, writing & reading activity!

Animal Cracker Math:
We LOVE working with food! The Lil Divas get such a kick out of it.
Animal crackers are a fun manipulative so I decided to do let the Lil Divas do some basic addition with them.


What You Need:
Animal Crackers
dice
dry erase board
dry erase markers

What We Did:

1. I gave each Lil Diva a large foam dice.

2. They rolled the dice and wrote the number on their dry erase board. 
Then they put down the corresponding number of animal crackers.

3. They rolled a 2nd time and added the new number to their dry erase board forming an addition problem by putting the + sign between the numbers. Then they added the corresponding amount of crackers for the 2nd roll and added/counted them all up to determine their total!


4. They wrote down their answer (making sure to include a = sign)
and I checked it before they moved on to a new problem!


They really enjoyed practicing addition with animal crackers &
after we were all done - they got to have a yummy snack! :)

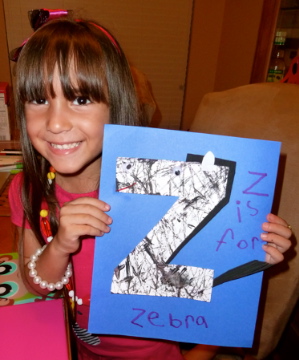
Handwriting Practice - Letter Z
In a previous post I shared that we formed the letter Z with foam and drew it on a ziploc baggie full of paint.

I noticed that the Littlest Diva was having trouble with slant/diagonal lines which you need to be able to do to properly form a letter Z. I found a great printable that her practice slant lines here.


Once she was able to make the slant lines on her own -
we worked on writing the Letter Z.

She is now able to write the Letter Z wonderfully & she makes great slant lines! Can I get a YAY!, for the Littlest Diva! She takes her handwriting so seriously - always competing with Big Sis.


Practicing Measurement & Basic Ruler Skills

Finally, I wanted to share this fun little book I found with you:


This is a thick board book that comes with a ruler attached (stores in a clear plastic pocket attached to the cover.
Each page of the book has something to measure (it tells you what to do in the text).

The Lil Divas LOVED measuring the animals & items in the book!

This was a really cute book that went great with our zoo theme
& provided some extra ruler practice.

Some Other Zoo Books We Read:


I hope you enjoyed what we shared of our Zoo Themed Fun!
Bern

ABC Fun Z is for Zebra: Marble Painting w/the Letter Z

We have had lots of fun with our Zoo Theme this past week. 
We read many fabulous stories, enjoyed lots of great crafts & activities that we will be sharing with you and even took a trip to the zoo! so much FUN!

Today we are sharing our ABC Letter Z craft with you.
This is going to be part of the ABC Book that I am creating with my 4yr. old.

It turned out so cute that even my soon-to-be Kindergartener wanted in on the fun.


Z is for Zebra

Isn't our Zebra Z cute?

Ready to make your own?

Here's What You Need:
white cardstock
blue construction paper
black foam
wiggly eye
black & red permanent marker
glue

Here's What We Did:

1. Using the white card stock I made a large Z template


2. I taped it onto a large tray and added a few drops of black paint and marbles (the Lil Diva used 4 to match her age!)


3. Then the Lil Diva had fun rolling the marbles to create stripes on the Z. After they were satisfied with their stripes we let the Z's dry.


Here's what they looked like after rolling. 


 To Turn the Z into a Zebra:
sorry about the lack of photos for this part - dead camera battery :(

4. I cut a mane out of black foam. The Lil Diva glued it under the Z and then cut strips to make it look like hair.

5. I cut out a tail & she cut it into strips to look like hair as well and we attached it to the lower part of the Z.

6. Add wiggly eye and draw smile & nostril (make side profile of face)

7. I had the Lil Diva copy Z is for Zebra onto the paper.


Didn't she do a great job? :)


We also practiced making the letter Z using our foam puzzles


and writing in a plastic baggie filled with black paint -
the Lil Divas LOVED writing this way.


Books:


Bern

Crafty Kits 4 Kids Giveaway Event: Paper Plate Zoo Animals Craft Pack


What is Crafty Kits 4 Kids Giveaway Event?
Michelle over at Best Toys for Kids is the heart, soul & brains behind this fun event.
She got 13 amazing bloggers together (including ME!) from all over the WORLD
to come up with some fun crafts for kids,
put it all together in a easy DIY kit &
offer a worldwide giveaway to all our readers/followers!

Below you will find our adorable Paper Plate Animal Crafts Giveaway
which includes all the materials you will need to make
your own paper plate lion, zebra & giraffe!! :)


After you are done entering our little giveaway -
be sure to check out the linky at the end of the post
to visit all the other blogs that are participating &
enter to win some more great craft kits for kids!

Happy Crafting!
Bern

***************************

Paper Plate Zoo Animals


#1 Paper Plate Lion Craft:


What You Need:
paper plate
brown paint
orange felt
glue
brown pom pom
black foam
wiggly eyes

What To Do:

1. paint paper plate brown


2. allow drying time
(we let them dry overnight)


3. cut around the paper plate to create a mane


4. add orange circle felt for face
( I cut a circle the same size as the inner circle of the plate)


5. cut ears out of paper plate & cover w/orange felt
glue under face and onto plate

6. cut mouth and whiskers out of black foam & add onto face


7. add brown pom pom nose


8. add wiggly eyes & let lion dry!


#2 Paper Plate Giraffe

What You Need:
paper plate
yellow paint
brown felt
craft stick
glue
wiggly eyes
brown marker


What To Do:

1. paint paper plate yellow


2. allow drying time
(we let plate dry overnight)


3. cut small circle of light brown felt for nose
& add nostrils and smile


4. I basically told the girl to make a smiley face


5. Glue nose onto face & using brown paint add spots

6. add small circles to wooden sticks


7. add wiggly eyes


8.  glue ears & antlers onto back of paper plate

9. Allow to dry


#3 Paper Plate Zebra

What You Need:
paper plate
black construction paper
black foam
glue
wiggly eyes
white crayon

What To Do:

1. assemble pieces needed:
cut large black circle for nose/mouth
cut ears out of paper plate & inner ear out of black construction paper
cut 6 large triangle shapes
cut strands of hair out of foam


1. glue inner ears to large ear cut outs and glue onto back of paper plate


2. glue hair onto back of paper plate
(I added some tape as well)


3. using white marker add nostrils & mouth 
to mouth piece and glue onto front of paper plate


4. Add triangles to each side of paper plate
(see picture below)

5. add wiggly eyes and allow all pieces to dry


Once dry you can enjoy your adorable
paper plate animals!


**************************
The Giveaway: (Open WORLDWIDE)
You will receive all the pieces needed to make each of the above 3 paper plate animals
(each animal is in a separate bag) & I will provide the instructions listed here.
Plus, you will receive a small washable paint set and two painting sponges.

All pieces have been cut & are ready to be painted, glued & assembled!


How to Enter:
Leave me a comment telling me which is your favorite zoo animal(s)!
(My fave zoo animals are the polar bear & giraffe)

Extra Entries:

Please leave a seperate comment for each entry &
please include your e-mail so I can contact you if you win! 

*If you are already a follower leave a comment that counts as an entry*
  1. Follow Mom to 2 Posh Lil Divas Publicly via Google Friend Connect  (+2) leave 2 comments 

  2. Follow Mom to 2 Posh Lil Divas on Twitter  (+2) leave 2 comments

  3. Subscribe to Mom to 2 Posh Lil Divas emails  (+2) leave 2 comments

  4. Subscribe to Mom to 2 Posh Lil Divas Newsletter  (+2) leave 2 comment

  5. Make a comment on any non-giveaway post on Mom to 2 Posh Lil Divas Blog and leave a link.  You can do this for up to 5 posts but please note that comment must be dated after the start date of this post - not valid on previous comments. (+2) leave 2 comments

  6. Tweet about this giveaway and leave a link - can be done once a day

    Tweet: 
    #Win a paper plate zoo animals craft pack w/@Momto2PoshDivas ends 8/13  #craftykitsforkidsgiveaway #giveaway #crafts

Giveaway Rules: 
Open WORLDWIDE
Giveaway ends 8/13/2011 at 11:59 (PDT)
Winner will be chosen via random.org
& contacted via email if an email is given .
Winner will have 48 hours to claim their prize.
Please note any entries that can not be verified will be disqualified.


After entering our giveaway - 
be sure to visit the other amazing bloggers/giveaways listed below
& check out our other fabulous giveaways! :)