Showing posts with label Easter Theme. Show all posts

Wordless Wednesday Linky - A Lil Diva Easter


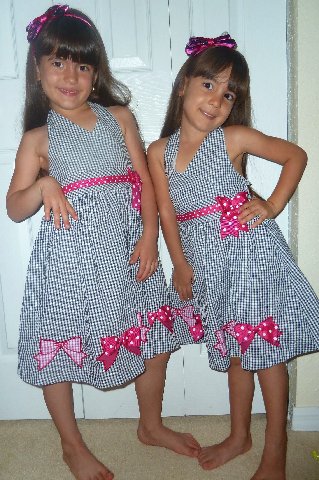
Can you say..... Divas in Training? :)


They love each other so much!
It makes my heart happy!


We had an amazing egg hunt at my brother's house! So many eggs & so much fun!


The Littlest Diva wore every piece of jewelry she found in her eggs! :) Love her style!


Trying to catch bubbles always
brings tons of giggles!


My Oldest Diva is getting so big!
No more baby - she is a big girl now! :(


The inspiration for these adorable pancakes came from Jenni Prince Illustration Pancake Art! The Lil Divas absolutely loved them and it was the perfect Easter morning breakfast!
I think I found a new tradition!

Ok, Now it's your turn - Link up your fab Wordless/Wordish Wednesday Posts!
I'd love to see them! Don't forget to leave me a comment below - I will be doing the same!
Bern


A Little Bit of Oil, A Little Bit of Vinegar & A Whole Lot of COLOR!

On Saturday, we finally got around to decorating our Easter Eggs!

The Lil Divas have been begging & pestering to do it all week but it was a pretty crazy week and I just never felt up to it!

Without any more time to put it off - I decided to bite the bullet & go for it and was glad that I did.

Though it didn't take us very long - we had a fun time and I enjoyed watching the Lil Divas bubbly enthusiasm over each new egg color!

We died a few using traditional egg dyes + vinegar for vibrant colors -


Then I decided to try something new - OIL!

I put a little bit of oil into coloring & then dipped the egg into 1 color - gently wiped off some excess oil and then dipped into another color!

We even got fancy and dipped in 3 different colors at the Lil Divas request!


I absolutely LOVED how the marbelized eggs came out! :) This will definitely be something we will do again.


Look at how pretty they ALL came out:


The Lil Divas were very proud of their Easter Eggs! :)

How did you decorate and/or color your eggs this year?

Bern

Helping Children Learn the Real Reason for Easter

Through all the fun and anticipation of Easter - bunnies, chicks, chocolates, jellybeans & baskets are everywhere. They seem to take over the holiday.

I like to take the time to talk to the Lil Divas about the reason we celebrate Easter - Jesus.  They are still young and of course I do not want to tramautize them by over emphasizing the tragedy of the crucifixion but I strongly feel that they should be introduced to the story - just in a way they can digest it.

Over Christmas we took the girls to watch their first Christmas Pageant and they saw the story of the crucifixion as part of it. They were talking about it for weeks and it really impacted them.

Now that Easter is upon us - I have been re-introducing the idea planted during the Christmas Pageant & Holiday Season.

In order to facilitate discussion and introduce the true Easter Story we have read the following books:


All of these stories emphasize the story of  Jesus - some are very simple and basic, the last one is a bit more detailed but even it glossed over the crucifixion so no need to worry.

Do you have any good Easter book recommendations? Now that the Lil Divas are getting a bit older for board books - they are fond of reffering to them as baby books these days - I am on the lookout for books that tell the Easter Story with a bit more detail but are still appropriate for their age group.

If you have any suggestions please be sure to comment - thanks!

We also worked on a cute "Stained Glass" Cross Craft:


What You Need:
white construction paper or cardstock
black construction paper
colored tissue paper
glue
scissors
cross template


What To Do:
1. Cut up the colored tissue paper into small squares
2. Cut out a cross template using the white paper.
3. Cut out a larger sized cross out of the black paper.
4. Glue the tissue paper squares to the white cross - encourage covering all the white - even if it overlaps. If you look at the picture above of the 2 crosses you will see the one on the left looks alot better bc my oldest covered up all the paper - it looks really good in the window!


5. Glue the white cross on top of the larger black cross & behold your faux stain glass cross!


This was a simple craft that looks really cute displayed on our windows!

How are you introducing and/or keeping Jesus in Easter with your family?

Easter Theme - Here Comes Peter Cottontail.....

This post is devoted entirely to bunnies and.... toilet paper rolls, cotton balls, fingerprints and french toast! :)

Sounds confusing but actually it isn't so join us for some Easter Bunny themed fun!

Books We Read:


Craft #1 - Toilet Paper Roll Bunnies

What You Need:
toilet paper roll
white paint
white & pink construction paper
pink & black marker
cotton balls
wiggly eyes
glue

What To Do:

1. Paint the toilet paper roll white & allow to dry


 2. While waiting for the roll to dry you can make bunny ears using the white construction paper - we used the pink for the inner ear.

3. Once the roll is dry you can glue the ears to the inside of the roll so they peek out and use the pink marker to make a bunny nose

 3. Using the black marker add a mouth and whiskers


4. Glue on wiggly eyes & let set for a few minutes (so they don't run)


5. While waiting for the eyes to dry - cut out some bunny feet like below to place under the toilet paper roll. I made them long in back so that it would come up over the roll (see below)


6. Glue feet to bottom & roll and glue tab in back - this helped it stay in place & was covered by the tail


7. Glue cotton balls to back for tail & behold your adorable TP Roll Bunny!


Craft #2 - Fingerprint Bunny  - we used these to make Easter cards for the grandparents but you could also do a few on a paper and turn it into a cute Easter scene or decorate a tile as a keepsake, etc... so many possibilities!


What You Need:
construction paper (whatever color you would like for the card or background)
white paint
black & pink markers

What To Do:

1. Put white paint on child's thumb and press onto paper for body


2. Put white paint onto child's pointer finger and apply on top of thumbprint for head


3. Put white paint onto child's pinky and make arms & feet


4. Put white paint onto child's pinky - extending beyond fingertip for ears


5. Allow paint to dry and then use black and  pink markers to make eyes, nose, mouth, whiskers, inner ears, etc.


Craft # 3 Handprint Bunny - this would also make a cute card or other momento


What You Need:
white paint
pink paint
yellow paint
paint brushes
construction paper – for background
glue
2 wiggly eyes (these can also be drawn using markers)
green shredded paper Easter grass (you can also draw grass or use construction paper)
black marker

What To Do:

1. Paint palm of hand using white paint


This will make the bunny’s body

2. Paint palm of hand & pointer finger and ring finger using white paint and press firmly near top of body print.


3. Use thumbprint to make feet.


After you have completed steps 1-3 above your bunny will look like this:

You can add hands - we forgot & after I realized the Lil Divas decided to leave them as they were.

4. Use thumbprint dipped in pink paint to make nose – apply sideways.


5. Once paint has dried – add wiggle eyes and use marker to draw a mouth and toes on feet (if desired).


 6. Add grass below bunny.


We added a sun for extra scenery. Remember - you can add whatever details you like and leave out what you don’t!


Food Idea: Bunny French Toast

I used a bunny face shaped cookie cutter to cut my bread and cooked my french toast as usual


Once the french toast was done I used raisins for the eyes and nose and red writing gel (for food) to add a mouth and ear details. This was so simple & the girls LOVED it!


Hope you enjoyed our Bunny crafts!

Bern